
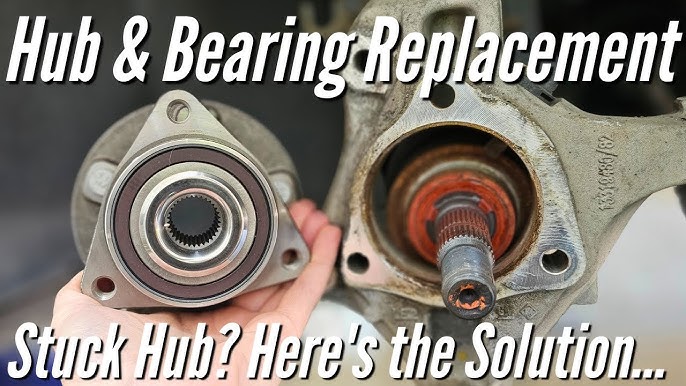
If you’ve noticed strange noises or a rough feeling while driving, your car’s wheel bearing might be the culprit. Changing a wheel bearing might sound tricky, but with the right steps, you can do it yourself and save time and money.
In this guide, you’ll learn exactly how to change your car’s wheel bearing safely and effectively. Keep reading—you’ll gain the confidence to handle this important repair on your own.
Signs Of A Bad Wheel Bearing
Recognizing the signs of a bad wheel bearing helps keep your car safe. Worn bearings affect how your wheels spin and can cause serious problems. Early detection prevents costly repairs and unsafe driving conditions.
Noise And Vibrations
One common sign is noise from the wheel area. You may hear a humming, grinding, or growling sound. The noise often gets louder with speed or when turning corners. Vibrations in the steering wheel or car body can also occur. These vibrations come from rough or damaged bearings.
Uneven Tire Wear
Bad wheel bearings cause tires to wear unevenly. You might see more wear on one side of the tire. This happens because the wheel does not rotate smoothly. Uneven wear reduces tire life and affects car handling. Check tires regularly for unusual patterns.
Abs Warning Light
The ABS warning light may turn on due to a faulty wheel bearing. Sensors near the wheel monitor speed and rotation. A bad bearing can disrupt sensor signals. This triggers the ABS light on your dashboard. Ignoring this warning can lead to brake problems.

Credit: www.tiktok.com
Tools And Materials Needed
Changing a wheel bearing requires certain tools and materials. Having the right items ready makes the job easier and safer. Below is a list of essential tools you will need.
Basic Hand Tools
- Socket wrench set
- Torque wrench
- Jack and jack stands
- Flathead and Phillips screwdrivers
- Pliers
- Hammer or mallet
- Breaker bar
- Wheel chocks
Specialized Equipment
- Wheel bearing puller or press
- Hub puller
- Grease or bearing lubricant
- Replacement wheel bearing
- Anti-seize compound
- Brake cleaner
- Caliper tool (if needed for brake removal)
Safety Gear
- Safety goggles to protect eyes
- Mechanic gloves for hand protection
- Dust mask to avoid inhaling debris
- Closed-toe shoes or boots
Preparing Your Car
Preparing your car properly before changing a wheel bearing is crucial for safety and efficiency. Taking the time to set up your workspace and secure your vehicle can save you from accidents and unnecessary frustration. Let’s break down the essential steps to get your car ready for this repair.
Parking And Securing
Start by parking your car on a flat, stable surface. This prevents any unwanted movement while you work. Avoid soft ground or slopes that could cause the car to shift unexpectedly.
Engage the parking brake firmly. This locks your rear wheels and adds an extra layer of security. Additionally, place wheel chocks or blocks behind the opposite wheels to stop any rolling.
Have you checked if your car’s manual recommends any special precautions? Some vehicles require specific positioning or additional supports. Taking a moment to review this can keep you safe throughout the process.
Removing The Wheel
Before lifting the car, loosen the lug nuts slightly with a wrench. Don’t remove them yet; just break the initial tightness to make it easier once the car is elevated.
Use a reliable jack to lift the car at the manufacturer’s recommended lifting points. Never place the jack under fragile areas like the exhaust or suspension components.
Once the car is raised, secure it with jack stands. Never rely solely on the jack itself for support while working under the vehicle. Safety always comes first.
Now you can fully remove the lug nuts and take the wheel off. Keep the lug nuts in a safe place so you don’t lose any during the repair.
Accessing The Wheel Hub
With the wheel off, you’ll see the brake components and the wheel hub assembly clearly. Remove the brake caliper carefully and hang it with a wire or bungee cord to avoid putting strain on the brake hose.
Next, remove the brake rotor to expose the wheel hub. Sometimes rust or debris can make this tricky, so use a rubber mallet to gently tap it free if needed.
Check the hub area for any dirt or corrosion. Cleaning this surface helps you spot damage and ensures the new bearing sits correctly. Are you ready to get your hands dirty for a smoother repair?
Removing The Old Wheel Bearing
Removing the old wheel bearing is a crucial part of the replacement process. This task requires careful handling of several car components. Proper removal ensures the new bearing fits correctly and works well. Follow each step with attention to detail for safety and success.
Detaching Brake Components
Start by loosening the lug nuts and removing the wheel. Next, detach the brake caliper by unbolting it from the bracket. Hang the caliper securely to avoid strain on the brake line. Remove the brake pads and set them aside safely. Finally, take off the brake rotor to expose the hub assembly.
Removing The Hub Assembly
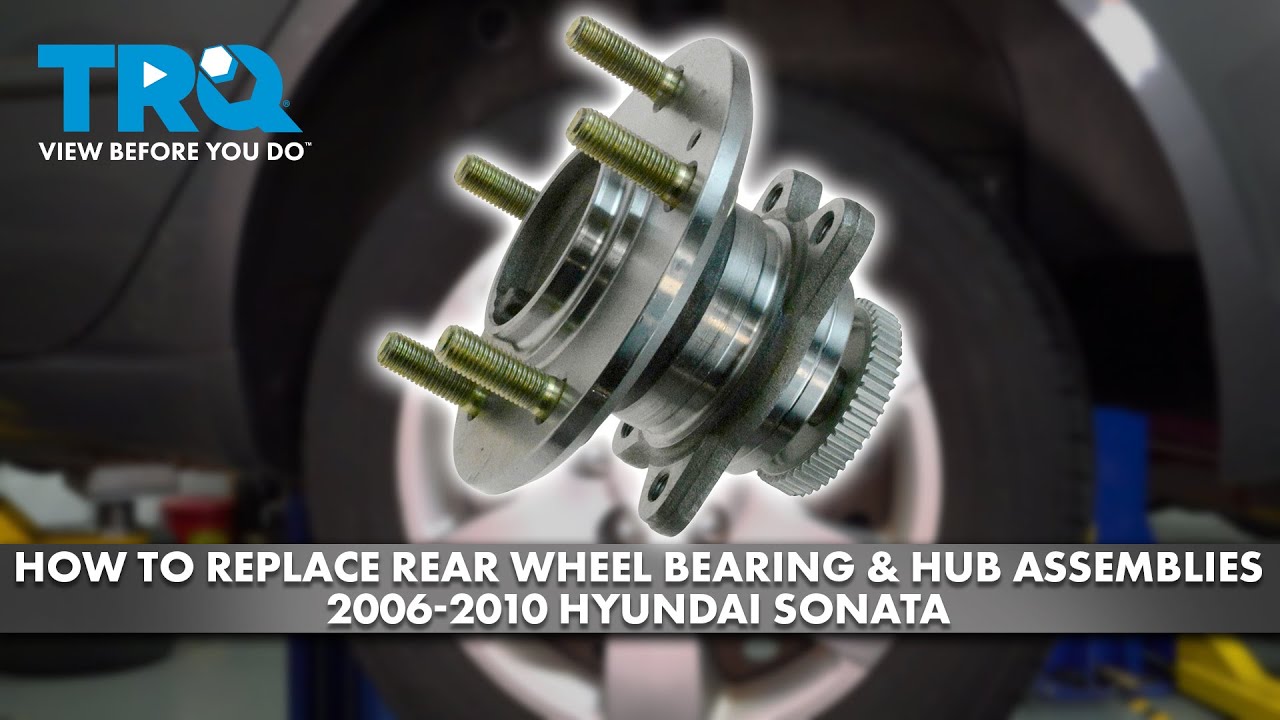
Remove the dust cap covering the axle nut. Use a wrench to loosen and remove the axle nut. Unbolt the hub assembly from the steering knuckle by removing the mounting bolts. Carefully pull the hub assembly away from the car. If stuck, gently tap with a rubber mallet to loosen it.
Extracting The Bearing
Use a bearing puller tool to remove the old bearing from the hub. Position the puller evenly to avoid damage. Slowly apply pressure until the bearing pops free. Clean the bearing housing area before installing a new bearing. Inspect the hub for any signs of wear or damage.
Installing The New Wheel Bearing
Installing the new wheel bearing is a key part of the replacement process. It requires careful work to ensure the bearing fits perfectly. Proper installation helps the wheel turn smoothly and safely.
Cleaning The Hub Area
Start by cleaning the hub area thoroughly. Remove all dirt, rust, and old grease. Use a wire brush and brake cleaner for best results. A clean surface helps the new bearing fit tightly and last longer.
Pressing In The New Bearing
Press the new bearing into the hub with steady, even pressure. Use a bearing press tool or a suitable socket to avoid damage. Make sure the bearing sits flush and does not tilt. A correct fit prevents noise and uneven wear.
Reassembling Components
Put the wheel components back in the right order. Reinstall the brake rotor, caliper, and wheel hub. Tighten bolts to the manufacturer’s torque specifications. Double-check all parts for secure fitting before lowering the car.
Testing And Final Checks
After replacing your car’s wheel bearing, it’s crucial to perform thorough testing and final checks. These steps ensure everything is installed correctly and your vehicle is safe to drive. Skipping this part can lead to costly damage or dangerous driving conditions.
Reinstalling The Wheel
Put the wheel back onto the hub carefully, aligning the holes with the lug studs. Hand-tighten the lug nuts first to keep the wheel in place without risking cross-threading. Once snug, use a torque wrench to tighten the lug nuts to the manufacturer’s specified torque.
Don’t skip the torque step—under-tightening can cause the wheel to wobble, and over-tightening might damage the studs. Double-check the tightness in a star pattern to ensure even pressure on the wheel.
Lowering The Car Safely
After reinstalling the wheel, slowly lower the car from the jack stands or lift. Use a jack carefully and remove the stands only when the vehicle is stable. Never rush this process; a sudden drop can cause injury or damage.
Once the car is fully lowered, give the wheel a final check. Spin it by hand to feel for any unusual resistance or noise. If something feels off, re-inspect your work before moving on.
Road Testing
Take your car for a short, controlled drive in a safe area. Listen closely for unusual noises like grinding, humming, or clicking, which often indicate bearing issues. Pay attention to how the car handles turns and if there’s any vibration through the steering wheel.
Ask yourself: Does the wheel feel stable? Is there any pulling to one side? If you notice problems, don’t hesitate to stop and reassess. Your safety depends on it, and catching issues early can save you from bigger headaches down the road.
Tips For Beginners
Changing a wheel bearing is a task that requires patience and precision. Beginners often find this process daunting. With the right tips, it can become manageable and rewarding. Start by gathering all necessary tools. Ensure you have a jack, wrench, and new wheel bearing. Safety is paramount, so wear gloves and goggles.
Common Mistakes To Avoid
Many beginners overlook certain mistakes while changing wheel bearings. Here are some common pitfalls:
- Not securing the car properly with a jack stand.
- Forgetting to inspect the hub for damage or rust.
- Using incorrect tools, leading to improper installation.
- Ignoring torque specifications for bolts and nuts.
- Failing to check for other potential issues like worn-out brakes.
When To Seek Professional Help
Understanding when to call a professional is crucial. If you notice unusual noises during installation, seek help. Difficulty in removing the old bearing means expert assistance is needed. If the wheel still wobbles after installation, don’t hesitate to consult a mechanic.
Safety is key. If you feel uncertain, a professional can ensure the job is done right. Remember, a well-installed wheel bearing prolongs your car’s life.
Credit: www.youtube.com

Credit: www.youtube.com
Frequently Asked Questions
How Do I Know If My Wheel Bearing Needs Replacement?
Signs include grinding noise, uneven tire wear, and wheel play. Vibrations while driving also indicate a worn bearing. Early detection prevents further damage and ensures safety.
What Tools Are Required To Change A Car Wheel Bearing?
You’ll need a jack, lug wrench, socket set, hammer, and bearing puller. Safety gloves and eye protection are also essential for the job.
How Long Does It Take To Replace A Wheel Bearing?
Typically, it takes 1 to 2 hours depending on your experience and vehicle model. Rushing may cause errors, so take your time.
Can I Replace A Wheel Bearing Myself Safely?
Yes, with proper tools and instructions, you can do it safely. Ensure the car is securely lifted and follow the steps carefully.
Conclusion
Changing a wheel bearing can seem tough at first. Step-by-step, it becomes easier to handle. Use the right tools and take your time. Safety matters, so always work carefully. Regular checks help keep your car running well. Replacing a worn bearing improves driving comfort and safety.
With practice, this task will feel less stressful. Keep this guide handy for future repairs. You can do it!