
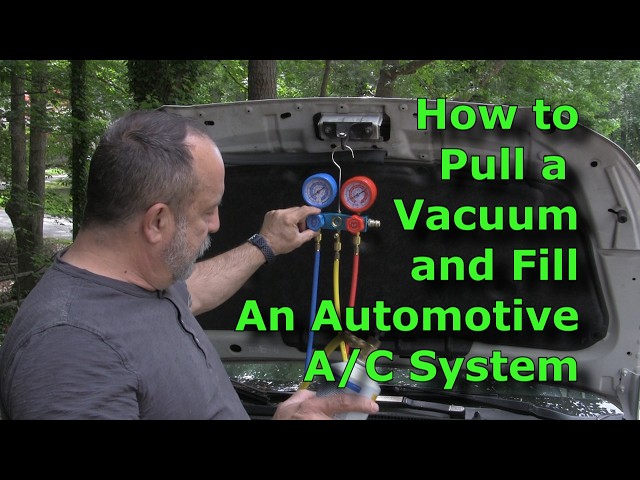
Is your car’s AC not cooling like it used to? You might need to vacuum your car’s AC system.
It sounds tricky, but with the right steps, you can do it yourself and save money. Imagine driving comfortably on a hot day without the constant worry of a warm breeze. In this guide, you’ll learn exactly how to vacuum your car’s AC, improve its performance, and avoid costly repairs.
Keep reading, and you’ll discover simple tips that make a big difference for your comfort and your car’s health.

Credit: m.youtube.com
Preparing Your Car Ac
Preparing your car AC before vacuuming is essential. It ensures a smooth and effective process. Proper preparation helps prevent damage and improves performance. Start by organizing everything you need. Then, follow safety practices to protect yourself and your vehicle. Clear steps will save time and avoid mistakes.
Gathering Necessary Tools
Collect all tools before starting. This helps avoid interruptions. You will need:
- Vacuum pump designed for AC systems
- Manifold gauge set
- Refrigerant recovery machine (if available)
- Safety goggles and gloves
- Wrenches and screwdrivers
- AC service valve core remover
Keep all tools within reach. Check that equipment is in good condition. Faulty tools can cause problems during the process.
Ensuring Safety Measures
Safety is critical when working with car AC systems. Wear protective gloves to avoid skin contact with refrigerant. Safety goggles protect your eyes from debris and chemicals. Work in a well-ventilated area to prevent gas buildup. Make sure the engine is off and cooled down. Avoid open flames and sparks near the AC system. Follow all safety instructions from tool manuals. Being cautious reduces risk of accidents and injuries.

Credit: www.youtube.com
Locating The Ac Service Ports
Locating the AC service ports is key to vacuuming your car’s air conditioning system. These ports allow access to the refrigerant lines. Proper identification helps avoid damage and ensures safe handling. The ports are usually near the engine, connected to the AC lines. Knowing their exact spot makes the vacuum process easier and more effective.
Identifying High And Low Pressure Ports
The AC system has two main service ports: high pressure and low pressure. Each port serves a different function during maintenance.
- Low pressure port:This port is larger and often has a plastic cap marked with “L” or blue color.
- High pressure port:Smaller in size, it usually has a cap marked with “H” or red color.
These ports connect to different sides of the AC system. The low pressure side handles the refrigerant gas before compression. The high pressure side manages compressed refrigerant. Mixing them up can cause injury or system damage.
Accessing The Service Valves
Service valves are behind the caps on the ports. Remove the caps carefully to avoid dirt entry.
- Check the valve condition for rust or damage.
- Use a wrench if the cap is tight.
- Keep caps safe for reinstallation after vacuuming.
Some cars may have the ports in tight spaces. Use a flashlight to see clearly. Avoid forcing tools into the valves. Proper access ensures a smooth vacuuming process and protects the AC system.
Connecting The Vacuum Pump
Connecting the vacuum pump properly is crucial for effective AC vacuuming in your car. This step ensures that the system is cleared of moisture and air, which can compromise your AC’s performance. Taking time to set up the vacuum pump connection correctly will save you from leaks and inefficient vacuuming later on.
Attaching The Hose Correctly
Start by selecting the right hose that fits snugly onto the vacuum pump and the car’s AC service port. A loose hose can cause air to enter the system, ruining the vacuum process. Push the hose firmly onto the pump’s outlet and the AC port until you feel a secure fit.
Check both ends visually and by gently tugging to make sure they won’t slip off during operation. If your hose has quick-connect fittings, listen for the click that confirms a locked connection. Remember, a small mistake here can mean redoing the whole process, wasting your time and effort.
Sealing Connections For Efficiency
Even a tight hose attachment might not guarantee a perfect seal. Use Teflon tape or rubber gaskets around the connection points to prevent any air leaks. This extra step can improve the vacuum pump’s efficiency significantly.
Once connected, test the seal by turning on the pump briefly and watching for any hissing sounds. If you detect a leak, tighten or reposition the hose and apply more sealing material if needed. Think about this: would you rather spend five extra minutes sealing now or deal with a malfunctioning AC later?

Credit: www.youtube.com
Running The Vacuum Process
Running the vacuum process is key to removing air and moisture from your car’s AC system. This step prepares the system for new refrigerant. It ensures better cooling and prevents damage.
Operating The Pump
Start by connecting the vacuum pump to the AC service ports. Turn on the pump and let it run. The pump pulls air and moisture out of the system. Keep it running for at least 30 minutes. This time allows the pump to create a strong vacuum. Make sure all valves on the manifold gauge set are open. This lets the pump work on the entire AC system.
Monitoring Vacuum Levels
Watch the vacuum gauge closely during the process. The goal is to reach a vacuum level below 500 microns. A steady reading at this level means the system is properly evacuated. If the vacuum rises quickly after turning off the pump, there may be a leak. Keep the pump running until the gauge reading stays stable. This ensures no air or moisture remains inside.
Checking For Leaks
Ensuring your car’s AC is leak-free is crucial for its efficiency. Leaks can decrease cooling effectiveness and damage the system. Regular checks help maintain optimal performance. Before vacuuming, identify any potential leaks in the system.
Using Vacuum Gauge Readings
A vacuum gauge is essential for checking AC leaks. Connect it to the AC system’s service port. Observe the readings closely. A steady reading indicates no leaks. Fluctuating or dropping readings may suggest leaks. This tool helps pinpoint leak locations.
Performing A Leak Test
A leak test confirms the presence of leaks in the AC system. Use a UV dye and a UV light for this test. Add the dye to the system and let it circulate. Use the UV light to inspect for any glowing areas. These indicate leak locations. Address any leaks found immediately.
Recharging The Ac System
Recharging the AC system restores cool air inside your car. Over time, refrigerant leaks or reduces, causing poor cooling. Adding the right amount of refrigerant ensures the system works well. This step requires care to avoid damage or poor performance.
Selecting The Right Refrigerant
Use the refrigerant type recommended by your car’s manufacturer. Most modern cars use R-134a or R-1234yf refrigerants. Check your car’s manual or the label under the hood for this information. Using the wrong refrigerant can harm the AC system and reduce cooling.
Filling To Recommended Levels
Never overfill the AC system. Too much refrigerant causes pressure problems and damages components. Use a pressure gauge to monitor the level while filling. Follow the exact amount listed in your car’s manual. Adding refrigerant slowly helps avoid spills and ensures proper filling.
Final Testing And Maintenance
After vacuuming your car’s AC system, the final testing and maintenance phase is crucial to ensure everything works perfectly and stays that way. This step confirms that your efforts have paid off and helps you catch any lingering issues before they become major problems. Let’s look at how you can verify the cooling performance and maintain your AC system regularly.
Verifying Cooling Performance
Once you’ve finished vacuuming and recharging the AC, turn on your car’s engine and set the AC to the coldest setting. Feel the vents to check if the air coming out is noticeably cooler within a few minutes.
Use a thermometer or an AC gauge to measure the temperature of the air blowing from the vents. Ideally, it should be around 40°F (4°C) or lower. If it’s not, there might be a leak or insufficient refrigerant that needs attention.
Pay attention to unusual noises or smells while the AC runs. These can indicate blockages or contamination inside the system. If you notice anything off, it’s better to inspect again rather than wait for a bigger issue.
Regular Ac System Care Tips
- Check your cabin air filter:A dirty filter reduces airflow and strains your AC. Replace it every 12,000 to 15,000 miles or as recommended.
- Run your AC regularly:Even in winter, running the AC for a few minutes helps keep the system lubricated and prevents seals from drying out.
- Keep the condenser clean:Leaves and dirt can block airflow. Gently clean the condenser with a soft brush or hose to maintain efficiency.
- Inspect hoses and connections:Look for cracks or leaks periodically. Early detection can save you from costly repairs.
I once ignored a small leak in my car’s AC hose. The cooling performance dropped slowly, and I had to replace the whole system later. Don’t let a small problem turn into an expensive headache.
How often do you check your car’s AC? Making maintenance a habit can extend the system’s life and keep your drives comfortable all year round.
Frequently Asked Questions
How Do I Vacuum Ac In My Car Safely?
To vacuum your car AC safely, wear protective gloves and goggles. Use a proper vacuum pump and connect it securely. Follow the manufacturer’s instructions to avoid refrigerant leaks or damage to the system. Work in a well-ventilated area for safety.
What Tools Are Needed To Vacuum Car Ac?
You need a vacuum pump, manifold gauge set, and refrigerant recovery machine. These tools help remove air and moisture from the AC system. Proper equipment ensures efficient vacuuming and prevents damage to your car’s AC.
How Long Should I Vacuum A Car Ac System?
Vacuum your car AC system for at least 30 to 45 minutes. This duration removes moisture and air effectively. Ensure the vacuum gauge shows a steady reading before refilling refrigerant for optimal performance.
Can I Vacuum Car Ac Without Refrigerant Recovery?
No, vacuuming without refrigerant recovery is unsafe and illegal in many areas. Recovering refrigerant prevents environmental harm and protects your AC system. Always use recovery equipment to comply with regulations and maintain system health.
Conclusion
Vacuuming your car’s AC helps it work better and last longer. Regular cleaning removes dirt and moisture inside the system. This keeps the air fresh and cool during hot days. You do not need special skills—just follow the right steps carefully.
Taking care of your car’s AC saves money on repairs later. A clean AC also improves your driving comfort. Try to check and vacuum your AC every few months. Simple actions can make a big difference for your car’s cooling system.