
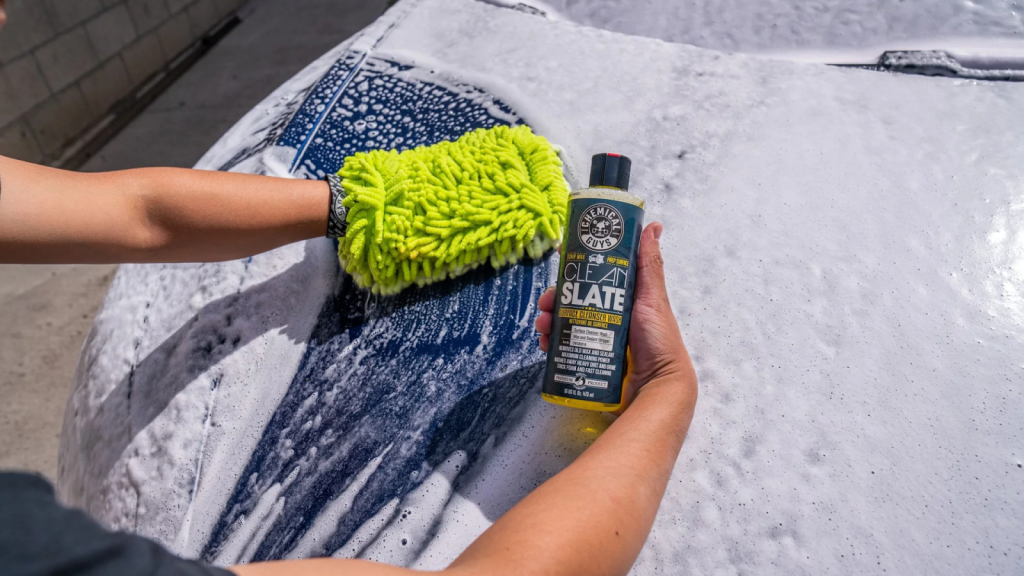
You love the shine your car gets after a fresh wax, but what happens when the wax starts to build up or gets uneven? Removing wax from your car might seem tricky, but it doesn’t have to be.
If you want your car’s paint to look smooth and spotless again, knowing the right steps can save you time and frustration. In this guide, you’ll discover simple and effective ways to get rid of old or excess wax, so your car looks its best every time you hit the road.
Keep reading—you’re just a few easy steps away from a flawless finish!
Why Remove Car Wax
Removing car wax might seem unnecessary, but it plays an important role in car care. Old or excess wax can harm your vehicle’s paint and affect its appearance. Knowing why to remove wax helps keep your car looking fresh and protected.
Common Reasons For Removal
- Wax buildup causes uneven shine and texture.
- Old wax can trap dirt and dust, making cleaning harder.
- Layering different waxes may cause cloudy or dull spots.
- Removing wax is needed before repainting or applying new wax.
- Wax removal helps restore the car’s smooth surface.
Effects Of Old Wax On Paint
Old wax loses its protective qualities over time. It can harden and crack, leading to uneven coverage. Dirt and grime get trapped under the wax, which can damage the paint.
Sunlight and weather break down old wax. This causes fading and spotting on the car’s surface. Wax residue can also attract water spots and stains. Removing old wax keeps paint healthy and ready for a fresh coat.
Credit: jaylenosgarage.com.au
Tools Needed
Before you start removing wax from your car, gathering the right tools can make the process smoother and more effective. Having the proper supplies on hand prevents frustration and saves time. Let’s look at what you need to get the job done right.
Essential Supplies
- Microfiber Cloths:These are soft and non-abrasive, perfect for wiping wax without scratching your paint. I always keep a few on hand because they absorb wax residue well.
- Car Wash Soap:A gentle soap designed for automotive finishes helps break down wax layers without damaging your paint. Avoid household detergents as they can strip away protective coatings.
- Warm Water:Useful for mixing with soap and rinsing off loosened wax. It helps soften the wax for easier removal.
- Clay Bar (optional but highly recommended):If your wax buildup is stubborn, a clay bar can safely lift remaining residues. It’s a game-changer for restoring smooth surfaces.
Optional Accessories
- Detailing Spray:This can help remove light wax residues and add shine after cleaning. It’s a quick fix if you want your car to look polished immediately.
- Plastic Scraper or Credit Card:Use cautiously to gently lift thick wax patches without scratching. I found that a plastic edge works better than metal for delicate surfaces.
- Foam Applicator Pads:These help apply wax removers or cleaning solutions evenly. They make the process more controlled and less messy.
- Protective Gloves:If you’re using chemical wax removers, gloves protect your skin. It’s better to be safe, especially with stronger products.
Do you have all these ready before starting? Having the right tools can turn a frustrating chore into a satisfying project. What tools do you find most helpful when working on your car?
Preparing Your Car
Prepare your car by washing it thoroughly to remove dirt before tackling wax removal. Use a soft cloth and a wax remover solution to gently clean the surface without damaging the paint. Rinse well and dry the car completely for the best results.
Preparing your car for wax removal is crucial for achieving the best results. A clean and dry surface ensures the wax can be effectively removed without damaging the paint. This process might seem simple, but it’s essential to get it right for a smooth, wax-free finish.Cleaning The Surface
Begin by rinsing your car with clean water to remove loose dirt and debris. Use a gentle car shampoo and a microfiber cloth to scrub the surface meticulously. Pay special attention to areas where wax buildup is noticeable, as these spots require thorough cleaning to ensure all wax is removed. A friend once shared how they thought a quick wash would suffice, only to realize streaks of wax remained. This highlights the importance of a detailed clean. Remember, a spotless surface is your foundation for effective wax removal.Drying The Car Properly
After cleaning, it’s vital to dry your car completely to avoid water spots. Use a clean, soft microfiber towel to gently dry each section of the car. Don’t rush this step; any remaining moisture can interfere with the wax removal process. Have you ever noticed water spots after washing your car? These can be frustrating, but a careful drying process helps prevent them. Ensure all crevices and hidden areas are thoroughly dried, as lingering water can affect your results. Taking the time to properly prepare your car sets the stage for a successful wax removal experience. Are you ready to see the difference a well-prepared surface can make?Methods To Remove Wax
Warm water and a soft cloth help soften wax for easy removal from your car’s surface. Using a gentle wax remover or rubbing alcohol can also clear leftover residue without damaging the paint. Always dry the area with a clean towel to prevent streaks.
Removing wax from your car requires careful attention to detail. Various methods can help you achieve a clean, wax-free surface. Each method has its own set of benefits and steps. Below, explore different techniques to make your car shine anew.Using Soap And Water
A simple soap and water wash can remove light wax layers. Start by using a car-specific soap. Regular dish soap can strip wax effectively. Mix the soap with warm water in a bucket. Use a soft sponge to wash the car gently. Rinse thoroughly with clean water. This method is ideal for frequent wax maintenance.Applying A Clay Bar
Clay bars remove stubborn wax and contaminants. Begin by washing the car to remove surface dirt. Use a clay lubricant to prevent scratches. Gently glide the clay bar over the car surface. Knead the clay if it becomes dirty. Wipe with a microfiber towel for a smooth finish.Using A Wax Remover Product
Wax remover products are specially formulated for this task. Choose a product suitable for your car’s paint. Apply the remover with a microfiber cloth. Rub in circular motions to dissolve the wax. Allow the product to sit for a few minutes. Wipe away with a clean cloth for a wax-free surface.Polishing Techniques
Polishing can effectively remove old wax layers. Use a dual-action polisher for best results. Apply a small amount of polish to the pad. Work on small sections at a time. Use gentle, overlapping strokes for even coverage. Buff with a microfiber cloth to reveal a glossy finish. This method also improves paint clarity.Step-by-step Removal Process
Removing wax from a car requires patience and the right approach. Following a clear, step-by-step process helps protect the paint and finish. This guide breaks down the removal into simple actions anyone can follow.
Initial Wash
Start by rinsing the car with water to remove loose dirt. Use a gentle car shampoo and a soft sponge to wash the waxed surface. This step removes dust and grime that might scratch the paint during wax removal. Rinse the car thoroughly after washing.
Wax Softening
Apply a warm, damp microfiber cloth to the waxed areas. Let the heat soften the wax for a few minutes. This makes the wax easier to remove without harsh scrubbing. Avoid using hot water directly, as it may damage the paint.
Removing Residue
Use a clean microfiber cloth with a small amount of rubbing alcohol or dedicated wax remover. Gently rub the wax in circular motions. Focus on one area at a time for better control. Replace the cloth if it becomes too dirty to avoid spreading wax around.
Final Rinse
Rinse the car once more with clean water to wash away any leftover residue. Dry the surface with a soft, clean towel to prevent water spots. Check the car under sunlight to ensure all wax traces are gone.
Credit: omniautoglass.com
Tips For A Spotless Shine
Achieving a spotless shine after removing wax from your car requires careful attention. Small habits can protect your car’s paint and enhance its glow. Follow simple tips to keep your car looking fresh and polished. Use the right tools and techniques to avoid damage and streaks. A clean, shiny car always looks well cared for.
Avoiding Scratches
Scratches ruin your car’s shine quickly. Always use gentle motions when wiping the car. Avoid using rough cloths or sponges. Dirt and debris can cause scratches if not removed properly. Rinse the car well before wiping to remove loose dirt. Use soft cleaning tools to protect the paint surface. Never apply too much pressure while cleaning. Scratches are easier to prevent than fix.
Using Microfiber Towels
Microfiber towels are perfect for removing wax. They are soft and absorbent, reducing streaks. Use clean microfiber towels only to avoid trapping dirt. Change towels often during the cleaning process. This helps prevent spreading wax or dirt around. Lightly wipe in circular motions for best results. Microfiber towels help achieve a smooth, shiny finish without scratches.
Proper Drying Methods
Drying your car correctly stops water spots and streaks. Use a clean, dry microfiber towel or chamois cloth. Pat dry instead of rubbing to avoid swirl marks. Dry the car in the shade to prevent quick drying spots. Avoid air drying as it leaves mineral deposits on paint. Take time to dry all areas, including door edges and mirrors. Proper drying keeps your car’s shine bright and even.
When To Reapply Wax
Knowing when to reapply wax on your car is just as important as the initial application. Wax doesn’t last forever, and leaving it on too long after it’s worn off can leave your paint unprotected. Paying attention to your car’s condition helps you maintain that fresh, glossy look and shields it from harsh elements.
Signs Wax Is Gone
One clear sign your wax is gone is water behavior on your car’s surface. When wax is active, water beads up and rolls off easily. If water starts to spread out and form flat patches, it means the protective layer is thinning or gone.
Look for dull or faded spots on your paint, especially after washing. Wax adds a subtle shine, so if your car looks lackluster, it’s time to check the wax layer. You might also notice that dirt and grime stick more stubbornly than before.
Try the simple touch test: rub a small area with your finger. If it feels rough or dry instead of smooth and slick, the wax has likely worn off. Don’t wait for visible damage; these signs help you act early.
Best Practices For Reapplication
Before reapplying wax, make sure your car is clean and dry. Dirt trapped under the wax can cause scratches and prevent proper bonding. Washing your vehicle thoroughly ensures the new layer sticks well.
Choose the right environment to wax your car—avoid direct sunlight and windy conditions. This helps the wax set properly and prevents streaking or uneven coverage. A shaded, cool spot is ideal.
- Use small sections to apply wax evenly
- Work in circular motions for better coverage
- Allow the wax to haze before buffing it off with a clean microfiber cloth
Ask yourself: Are you using the right wax for your car’s paint type? Some waxes suit newer paints better, while others are great for older finishes. Matching your wax to your car’s needs improves protection and shine.
Consistency is key. Plan to reapply wax every 2-3 months or after heavy exposure to rain, snow, or car washes. This habit keeps your car looking great and protected year-round.
Common Mistakes To Avoid
Removing wax from a car seems easy but many make avoidable mistakes. These errors can damage the paint or make the job harder. Knowing what to avoid helps keep the car’s finish safe and clean.
Using Harsh Chemicals
Harsh chemicals can strip the wax but harm the paint too. Strong solvents may cause fading or discoloration. Avoid using household cleaners or industrial solvents. Instead, pick products made for automotive use. Always test a small area first to check for damage.
Skipping Preparation Steps
Many skip washing or drying the car before removing wax. Dirt and dust can scratch the surface during cleaning. Always wash the car thoroughly with soap and water first. Dry the surface completely to prevent water spots. Proper preparation makes wax removal easier and safer.
Credit: omniautoglass.com
Frequently Asked Questions
How Do I Safely Remove Wax From My Car?
Use a microfiber cloth and warm water to soften the wax. Gently wipe the wax in circular motions. Avoid harsh chemicals to protect your car’s paint finish. For stubborn wax, use a dedicated wax remover or clay bar.
Can I Remove Car Wax With Household Items?
Yes, some household items like vinegar or rubbing alcohol can remove wax. Dilute vinegar with water to avoid damage. Test on a small area first. Use gently to prevent paint scratches or dullness.
How Long Should I Wait Before Removing Wax?
Wait at least 20-30 minutes after applying wax before removal. This allows the wax to set and bond properly. Removing wax too soon can reduce protection and cause streaks or smudging.
What Tools Help In Removing Wax From Cars?
Microfiber cloths, clay bars, and wax removal sprays work well. Microfiber cloths prevent scratching. Clay bars remove embedded wax residues. Wax removal sprays dissolve hardened wax for easier wiping.
Conclusion
Removing wax from your car is easier than you think. Use gentle tools and mild cleaners for best results. Always test a small area first to avoid damage. Take your time and work carefully to protect the paint. Clean surfaces help your car shine and stay smooth.
Regular care keeps your vehicle looking fresh and new. Follow these simple steps for a clear, wax-free finish every time. Your car will thank you with a cleaner, brighter look.