
Your car just got that fresh body repair, and now it’s time to make it shine like new again. Polishing your car after body repair isn’t just about looks—it protects your paint and brings out its true color.
But how do you get a smooth, flawless finish without causing damage? If you want your car to turn heads and keep that fresh, showroom shine, you’re in the right place. Keep reading to discover simple, effective steps that will help you polish your car like a pro, right at home.
Preparing The Surface
Preparing the surface is essential before polishing a car after body repair. This step ensures the paint looks smooth and shines evenly. A clean and well-prepared surface helps the polish work better. Skipping this step may cause uneven results or damage the paint.
Cleaning The Repaired Area
Start by washing the repaired area with soap and water. Use a soft cloth or sponge to remove dirt and dust. Avoid harsh chemicals that can damage the paint. Dry the area completely with a clean microfiber towel. This prevents water spots and helps polish stick better.
Removing Residual Compound
Body repair often leaves small amounts of compound or filler on the surface. Use a clean cloth with a bit of rubbing alcohol or a dedicated pre-polish cleaner. Gently wipe the area to remove any residue. This step clears the surface for a smooth polish application.
Assessing Paint Condition
Check the paint for scratches, swirl marks, or dull spots. Use bright light to see imperfections clearly. This helps decide the polish type and intensity needed. Note any areas that need extra attention during polishing.
Choosing The Right Tools
Choosing the right tools makes a huge difference when polishing your car after body repair. The right equipment helps you achieve a smooth, flawless finish without causing more damage. You want to work smarter, not harder, and selecting the correct pads, compounds, and polishers ensures you do just that.
Selecting Polishing Pads
Polishing pads come in various materials and levels of abrasiveness. Foam pads are great for finishing and applying lighter polish, while microfiber or wool pads are better for cutting through heavier imperfections.
Think about the condition of your car’s paint—do you need to remove deep scratches or just add shine? Using the wrong pad can either waste your time or harm the paint.
Always match the pad type with the polishing compound to avoid uneven results. For example, a soft foam pad pairs well with a finishing polish, but if you’re tackling rough spots, a wool pad with a cutting compound works better.
Picking The Best Polishing Compounds
Not all polishing compounds are created equal. Some are abrasive and designed to remove scratches and oxidation, while others are gentle and meant to refine the surface.
Ask yourself: What’s the current state of your car’s paint? If it’s freshly repaired, you might need a medium-cut compound to level out imperfections before finishing.
Look for compounds labeled as “fast-cut” or “fine polish” depending on your needs. Using a compound that’s too harsh can strip away paint layers, so start with less aggressive options if unsure.
Using A Dual-action Polisher
A dual-action (DA) polisher is your best friend for safe, effective polishing. It spins and oscillates, reducing heat buildup and the risk of burning the paint.
Compared to rotary polishers, DA polishers are easier to control and better suited for beginners. Have you ever struggled with uneven polish or swirl marks? A DA polisher helps prevent those problems.
Keep your polisher moving steadily across the surface; don’t linger too long in one spot. This tool lets you achieve a professional finish without needing extensive experience or risking damage.
Step-by-step Polishing Process
Polishing your car after body repair is essential to restore its shine and smoothness. The process removes small scratches and evens out the paint surface. Follow this simple step-by-step guide to achieve a professional finish.
Applying Compound Properly
Start with a clean, dry car surface. Use a quality rubbing compound suited for your paint type. Apply a small amount of compound to a soft foam applicator or polishing pad. Work on one section at a time to avoid the compound drying out.
Spread the compound evenly in circular motions. Do not press too hard; gentle pressure works best. Let the compound sit for a few seconds to break down imperfections before buffing it off.
Polishing Techniques For Even Shine
Use a dual-action polisher or polish by hand with a microfiber cloth. Move the polisher slowly and steadily across the surface. Overlap each pass slightly for full coverage. Keep the polisher flat to avoid uneven polish lines.
Polish in small sections to maintain control. After polishing, wipe the area with a clean microfiber towel. Check the shine under good light to spot missed spots or haze.
Avoiding Common Polishing Mistakes
- Do not polish on a hot surface or in direct sunlight.
- Avoid using too much compound, which can cause swirl marks.
- Never rush the process; slow and steady yields better results.
- Use clean applicators and towels to prevent dirt scratches.
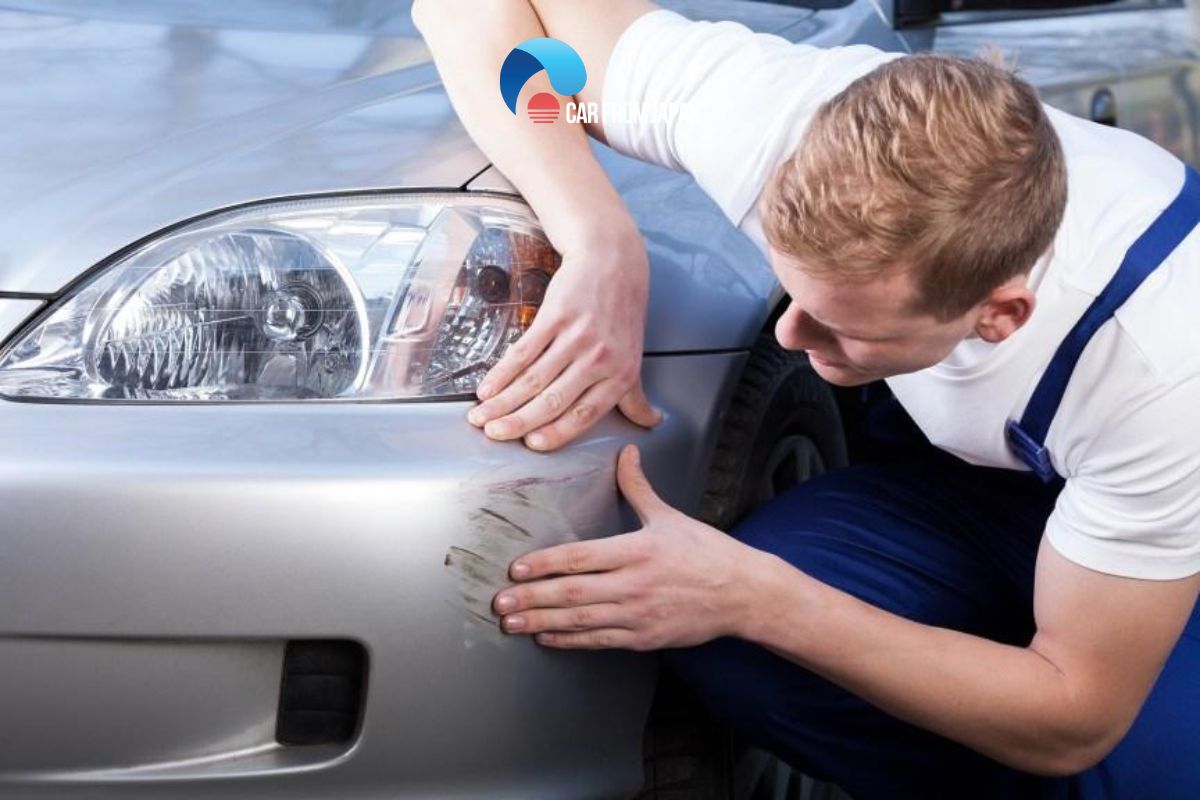
- Do not polish over areas with deep damage or bare metal.
Credit: carfromjapan.com
Finishing Touches
After polishing your car following a body repair, the finishing touches are crucial. These steps ensure your car shines evenly and stays protected. Taking time with these details brings out the best look and durability.
Removing Polishing Residue
Polishing leaves behind a fine layer of residue on the paint surface. Use a clean microfiber cloth to gently wipe this away. Avoid harsh rubbing to prevent new scratches. Light, circular motions work best to remove all residue. This step prepares the surface for wax or sealant application.
Applying Wax Or Sealant
Wax or sealant protects the polished surface and adds shine. Choose a high-quality product designed for automotive paint. Apply a thin, even layer using a foam applicator or soft cloth. Let it dry to a haze, then buff gently with a clean microfiber towel. This layer seals the paint and extends its life.
Inspecting For Flaws
Carefully check the car under good light. Look for spots missed during polishing or application. Notice any swirl marks, scratches, or uneven shine. Use a magnifying glass if needed. Fix small flaws with a touch-up polish or reapply wax in weak areas. This final check ensures a flawless finish.
Maintaining The Shine
Polishing a car after body repair restores its smooth, shiny surface quickly. Use a soft cloth and polish gently to avoid scratches and bring back the original gloss. Regular polishing keeps the paint fresh and protects it from damage.
Maintaining the shine of your car after a body repair is crucial. A well-polished car not only looks great but also preserves its value. Regular care ensures the paint remains vibrant and scratch-free. Let’s explore some simple techniques to maintain that fresh-off-the-lot sparkle.Regular Washing Tips
Wash your car weekly to remove dirt and dust. Use a mild car shampoo to avoid harming the paint. Rinse thoroughly with clean water. Dry with a microfiber cloth to prevent water spots. Regular washing protects the paint and enhances the shine.Touch-up Care For Minor Scratches
Inspect your car for minor scratches regularly. Use touch-up paint that matches your car’s color. Clean the area before applying the paint. Apply in thin layers for best results. Let it dry completely to blend seamlessly with the existing paint.Protecting Paint From Environmental Damage
Keep your car parked in shaded areas. Use a car cover if parking indoors is not possible. This protects the paint from UV rays and bird droppings. Apply a wax coating every few months. Wax acts as a protective layer against rain and sun damage. Regular waxing enhances the car’s shine and longevity.
Credit: gorvia.en.made-in-china.com

Credit: m.youtube.com
Frequently Asked Questions
How Soon Should You Polish After Body Repair?
Polishing should be done after the paint fully cures, usually 30 to 60 days post-repair. This ensures the finish hardens properly and avoids damage. Early polishing can cause uneven shine or scratches. Always follow the repair shop’s advice for the best timing.
What Tools Are Needed To Polish A Repaired Car?
You need a dual-action polisher, polishing pads, and quality polishing compound. Microfiber towels help remove residue. Safety gear like gloves and eye protection is recommended. Using the right tools ensures a smooth, scratch-free finish and enhances your car’s restored appearance.
Can Polishing Remove Paint Imperfections After Repair?
Yes, polishing removes minor scratches, swirl marks, and oxidation from repaired paint. It smooths the surface and restores shine. However, deep scratches or damage may require additional touch-ups or repainting. Polishing is a crucial step to achieve a flawless finish.
Should You Wax After Polishing A Repaired Car?
Yes, waxing seals and protects the polished surface. It adds a glossy finish and shields paint from UV rays and contaminants. Waxing prolongs the polish’s effects and keeps your car looking freshly repaired and shiny for longer periods.
Conclusion
Polishing your car after body repair restores its shine and smooth finish. Use the right tools and polish carefully for best results. Take your time and work in small sections to avoid mistakes. Clean the surface well before starting to remove dust and dirt.
A good polish protects your car and makes it look like new. Regular polishing keeps the paint bright and fresh longer. Enjoy the smooth, glossy look that shows your car care. Simple steps can make a big difference in your car’s appearance.