
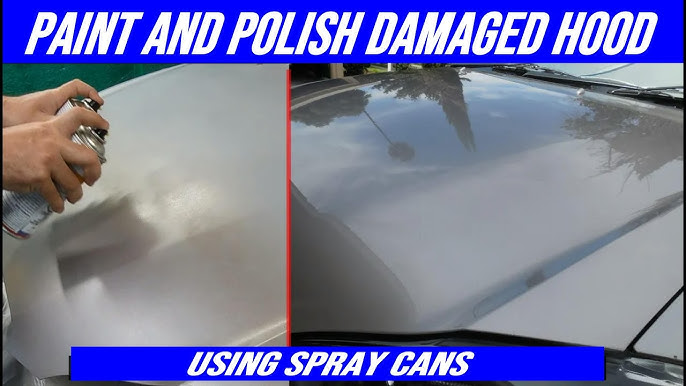
Are you looking to give your car hood a fresh, professional-looking paint job without breaking the bank? Painting your car hood with spray cans is a smart, budget-friendly way to breathe new life into your vehicle.
But it can feel tricky if you’re not sure where to start. Don’t worry—this guide will walk you through every step, making the process simple and manageable. By the end, you’ll have the confidence and know-how to transform your car hood with a smooth, even finish that turns heads.
Ready to get started? Let’s dive in!

Credit: www.youtube.com
Preparing The Car Hood
Preparing your car hood correctly is the foundation for a flawless paint job. Skipping or rushing this stage often leads to uneven paint and peeling later. Taking time to prepare means your spray paint will stick better and look professional.
Cleaning The Surface
Start with a thorough clean to remove dirt, grease, and old wax. Use a strong degreaser or automotive cleaner to get rid of all contaminants. Even small traces of oil can cause paint to bubble or peel, so don’t skip this step.
After cleaning, rinse the hood with water and dry it completely using a microfiber cloth. You want a spotless surface before moving on. Have you ever painted over grime only to see spots fail? Avoid that frustration by being meticulous here.
Sanding For Smoothness
Sanding creates the perfect texture for the paint to hold onto. Use 400-600 grit sandpaper for a smooth finish. Sand in circular motions, focusing on rough spots and any old paint chips.
If you encounter rust or deep scratches, start with coarser sandpaper (around 320 grit) to remove those defects first. Then finish with finer grit to even out the surface. This step is where patience pays off — a smooth hood means fewer imperfections in your final coat.
Masking Surrounding Areas
Protect areas you don’t want painted by applying masking tape and paper. Cover the windshield, headlights, and grille carefully. Use painter’s tape for clean edges and avoid paint bleed.
Don’t forget to mask off the edges of the hood itself to prevent overspray on the fenders. Your future self will thank you when you don’t have to do tedious cleanup or sanding. Are you ready to treat your car hood like a canvas and keep everything outside the lines safe?
Choosing The Right Spray Paint
Choosing the right spray paint for your car hood is crucial to achieving a smooth, long-lasting finish. The paint you select affects not only the look but also the durability of your work. Before grabbing a can off the shelf, take time to understand the types available, how to match your car’s color, and which primer and clear coat will protect your new paint job.
Types Of Automotive Spray Paints
Automotive spray paints come in several varieties, each designed for specific needs. Acrylic enamel is a popular choice because it’s affordable and provides a glossy finish. Acrylic lacquer dries quickly and is easy to apply, but it’s less durable.
For a tougher, longer-lasting coat, consider urethane spray paints. They resist chips and UV damage but may require a separate hardener. Water-based paints are more eco-friendly and easier to clean up, but might need more coats for full coverage.
Color Matching Tips
Matching your car’s original color can be tricky. Look for the paint code on your vehicle’s identification plate—it’s the most reliable way to find an exact match. If you can’t find the code, taking a small piece or a high-quality photo to a paint store helps.
Test the spray paint on a hidden area first. Lighting can change how the color appears, so check your sample in different light conditions. Don’t rush this step; a close match makes your finished hood look professional and seamless.
Selecting Primer And Clear Coat
Primer prepares the surface and helps paint stick better. Choose a primer compatible with your spray paint type—some primers work best with enamel, others with urethane. A good primer also fills in minor scratches and creates a smooth base.
After painting, apply a clear coat to protect the color and add shine. Clear coats come in different finishes like gloss, satin, or matte—pick one that matches your desired look. Applying the clear coat evenly is key to preventing drips and ensuring a durable finish.
Setting Up Your Workspace
Setting up your workspace is the foundation of a successful car hood painting project. A well-prepared area helps you work efficiently, avoid mistakes, and protect your health. Before you start spraying, take the time to create an environment that supports smooth and safe painting.
Choosing A Well-ventilated Area
Spray paint releases fumes that can be harmful if inhaled in large amounts. Pick a spot outdoors or in a garage with open doors and windows to let fresh air circulate. If you must work indoors, use fans to push fumes outside and keep the space as open as possible.
Think about the weather too. Wind can blow dust onto your wet paint, ruining the finish. A calm day with mild temperatures is ideal for painting your car hood.
Gathering Necessary Tools
Having all your tools ready before you begin keeps you focused and speeds up the job. You’ll need spray cans of primer, paint, and clear coat, along with sandpaper, masking tape, and plastic sheets or newspapers to cover areas you don’t want painted.
- Wear disposable gloves to keep paint off your hands
- Use a respirator mask designed for painting
- Keep clean rags and a small bucket of water nearby for quick cleanup
Setting everything within arm’s reach prevents unnecessary interruptions that can affect the paint’s smoothness and drying time.
Protecting Yourself
Your safety matters just as much as the quality of your paint job. Spray paint contains chemicals that can irritate your skin, eyes, and lungs. Always wear a respirator mask rated for paint fumes to avoid breathing in harmful particles.
Protective eyewear shields your eyes from accidental splashes. Long sleeves and pants help prevent skin contact, and gloves are a must. If you’ve ever felt dizzy or lightheaded while painting, it’s a sign that proper protection wasn’t enough—don’t risk it.
Would you want to rush your project only to deal with health issues later? Take a moment now to gear up properly and keep your workspace safe for your body and your paint job.
Applying Primer
Applying primer is a crucial step in painting a car hood. It ensures better paint adhesion and a smoother finish. This process requires attention to detail and patience. Here’s how to do it effectively.
Shaking And Testing The Can
Shake the primer can for at least one minute. This helps mix the contents well. Test spray on a piece of cardboard. This ensures the nozzle is clear and the spray is even. Adjust your distance if needed.
Spray Techniques For Even Coverage
Hold the can 12 inches from the surface. Use sweeping motions across the hood. Start spraying before reaching the edge and continue past it. Overlap each pass slightly to avoid streaks. Keep your pace steady for an even coat.
Drying Time Guidelines
Allow the primer to dry fully before applying paint. This usually takes about 20 minutes. Check the can for specific drying times. Touch the primer gently to ensure it’s dry to the touch. If not, wait a bit longer before proceeding.
Spraying The Base Coat
Spraying the base coat is a critical stage in painting your car hood with spray cans. This layer sets the tone for the entire finish, so applying it correctly impacts both the color vibrancy and durability. Getting this right means your car hood will look professional and last longer under different weather conditions.
Layering Paint For Depth
Applying multiple thin layers instead of one thick coat helps you achieve a richer and smoother finish. Each layer adds depth to the color, making it look more vibrant and less flat. Wait about 10-15 minutes between coats to let the paint settle but not dry completely, which helps layers blend seamlessly.
I once rushed this step and ended up with uneven color and rough texture. Patience here pays off more than trying to cover the surface quickly. Think of each layer as building blocks that create a stronger, more visually appealing surface.
Avoiding Drips And Runs
Drips happen when you spray too much paint in one spot. Keep your spray can moving in steady, even strokes to prevent pooling. If you notice a drip forming, stop spraying and let it dry before lightly sanding and respraying.
- Hold the can upright to maintain consistent spray pressure.
- Spray with short bursts rather than a continuous stream.
- Keep an eye on edges where paint tends to accumulate.
Have you ever seen a paint drip ruin an otherwise perfect job? Taking your time and controlling your spray can’s motion avoids these frustrating mistakes.
Maintaining Consistent Distance
Hold the spray can about 8-12 inches away from the hood. Too close, and you risk paint buildup and runs; too far, and the coverage becomes uneven and patchy. Practice keeping a steady hand and consistent distance for an even coat.
Use your arm, not just your wrist, to move the can smoothly across the surface. This helps maintain a uniform distance and avoids sudden bursts of paint in one area. Before you start, test on a scrap piece to get a feel for the spray range.

Credit: www.youtube.com
Adding The Clear Coat
Adding the clear coat is a crucial step in painting your car hood with spray cans. It not only gives your paint job a professional finish but also protects the surface from weather, scratches, and fading. Understanding how to apply the clear coat correctly will ensure your work lasts longer and looks sharper.
Enhancing Shine And Protection
The clear coat acts like a shield over your paint. It boosts the shine, making colors look deeper and more vibrant. Without this layer, your paint can look dull and lose its brilliance quickly.
Think about the last time you noticed a car with a flawless, glossy finish. That’s the clear coat doing its job. It also guards against UV rays and minor abrasions, which can quickly damage unprotected paint.
Applying Multiple Layers
Applying the clear coat in several thin layers is key. Thick layers can drip or peel, ruining all your hard work. Spray a light, even coat, wait a few minutes for it to tack up, then add another.
- Hold the can about 6-8 inches away from the surface.
- Use steady, sweeping motions to avoid buildup.
- Apply 3-4 thin layers for the best durability and shine.
Have you ever seen paint bubbling or cracking? That usually happens when the clear coat is applied too thick or too fast. Patience pays off here.
Proper Drying And Curing
Drying your clear coat properly can’t be rushed. After spraying, let the hood dry in a dust-free area for at least 24 hours. This prevents particles from sticking and causing imperfections.
Once dry, the clear coat still needs time to cure fully. This process can take several days to weeks, depending on temperature and humidity. Avoid washing or heavy handling during this time to keep the finish intact.
Have you noticed how some car finishes feel tough and others seem soft? That difference often comes down to proper curing. Give your paint the time it needs to harden for a lasting finish.
Finishing Touches
Finishing touches bring your car hood paint job to life. This phase ensures a clean look and lasting shine. Careful attention here improves the overall quality and durability of the paint.
Removing Masking Tape
Remove the masking tape carefully once the paint dries. Pull the tape slowly at a 45-degree angle. This prevents peeling or damaging the new paint. Remove tape before the paint fully hardens for best results.
Polishing And Buffing
Polish the hood to smooth out the surface. Use a fine polishing compound with a soft cloth or buffer. Work in small sections with gentle pressure. Buffing brings out the paint’s shine and removes minor imperfections.
Inspecting For Flaws
Check the hood under good light for any flaws. Look for runs, dust spots, or uneven areas. Mark any imperfections and fix them with light sanding and repainting. A thorough inspection guarantees a professional finish.

Credit: www.youtube.com
Common Mistakes To Avoid
Skipping proper surface cleaning can cause paint to peel quickly. Applying too much paint leads to drips and uneven layers. Rushing the drying process often results in a rough, patchy finish.
Painting a car hood with spray cans can be a rewarding DIY project. Yet, many make common mistakes. These errors can lead to unsatisfactory results. It’s essential to know what to avoid.
Painting In Poor Weather
Avoid painting on humid or rainy days. Moisture affects paint adhesion. Cold temperatures can also hinder paint drying. Choose a warm, dry day for best results. Consider indoor spaces with proper ventilation.
Skipping Surface Prep
Never skip prepping the surface. Clean the hood thoroughly. Remove all dirt and grease. Sanding the surface is crucial. It ensures paint adheres properly. Use a tack cloth to remove dust after sanding.
Overapplying Paint
Avoid applying thick coats of paint. It leads to drips and uneven surfaces. Instead, use thin, even coats. Allow each layer to dry before applying another. Patience is key to achieving a smooth finish.
Maintenance Tips For Lasting Finish
Keeping your car hood looking fresh after painting takes effort. Proper care helps the paint last longer and stay vibrant. Follow simple habits to protect the finish from damage and fading. These tips keep your paint job smooth and shiny for years.
Regular Cleaning
Clean the hood often to remove dirt and grime. Use mild soap and water with a soft cloth or sponge. Avoid harsh chemicals that can strip the paint. Rinse thoroughly and dry with a microfiber towel. This prevents buildup that can dull the finish.
Waxing Schedule
Apply wax every few months to shield the paint. Wax adds a protective layer against UV rays and moisture. Use a quality car wax and follow the instructions carefully. Buff the wax gently to a shine. This helps maintain color and prevents peeling.
Touch-up Techniques
Fix small chips and scratches quickly to avoid rust. Use matching spray paint for touch-ups. Clean the area well before applying paint. Apply thin coats and let each dry fully. This keeps the hood smooth and prevents larger damage.
Frequently Asked Questions
How Do I Prepare A Car Hood For Spray Painting?
Clean the hood thoroughly to remove dirt and grease. Sand it lightly for better paint adhesion. Use primer before applying spray paint to ensure a smooth finish.
What Type Of Spray Cans Work Best For Car Hoods?
Use automotive-grade spray paint designed for metal surfaces. Choose cans with UV protection and rust inhibitors for durability. Always select a color that matches your vehicle’s original paint.
How Many Coats Of Spray Paint Should I Apply?
Apply 2 to 3 thin coats of spray paint. Allow each coat to dry for about 10-15 minutes. Multiple thin layers prevent drips and create an even finish.
Can I Paint A Car Hood Without Removing It?
Yes, you can paint the hood while it’s attached. Mask off surrounding areas to avoid overspray. Ensure proper ventilation and work in a dust-free environment.
Conclusion
Painting a car hood with spray cans is a simple task. Take time to prepare the surface well. Use smooth, even strokes for the best finish. Let each coat dry before applying the next. Clean tools and space keep your work neat.
Practice patience and care for better results. You can refresh your car’s look without much expense. Try this method and see the difference yourself. Painting can be fun and rewarding. Give your car a fresh, new look today.