
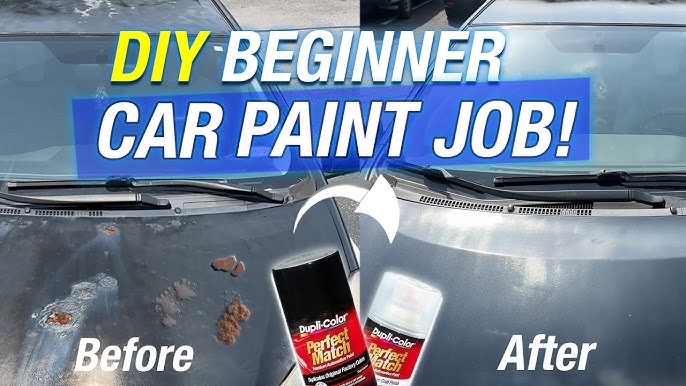
Is your car bumper looking dull or scratched? You don’t need to spend a fortune at the body shop to fix it.
With a little patience and the right steps, you can give your bumper a fresh, smooth look using spray paint. Imagine saving money and feeling proud every time you see your car shine like new. In this guide, you’ll learn exactly how to paint your car bumper with spray paint, even if you’ve never done it before.
Ready to transform your car and boost its curb appeal? Let’s dive in!

Credit: www.youtube.com
Preparing The Bumper
Preparing your car bumper is the foundation of a successful paint job. Skipping or rushing through this stage can lead to peeling, uneven color, or a finish that doesn’t last. Taking your time here ensures your spray paint adheres well and looks professional.
Cleaning The Surface
Start by thoroughly washing the bumper with soap and water to remove dirt and grime. Any grease or residue can prevent paint from sticking properly. After washing, wipe the surface with a wax and grease remover to make sure it’s perfectly clean.
Have you noticed how even tiny dust particles can ruin a paint job? That’s why this step matters more than you think.
Sanding For Smoothness
Sanding smooths out the bumper’s surface and helps the paint grip better. Use fine-grit sandpaper (around 400-600 grit) and sand evenly across the entire area. Don’t press too hard—light, consistent strokes work best.
Remember, your goal is to create a slightly rough surface, not to remove all the old paint.
Repairing Imperfections
Check the bumper for scratches, dents, or cracks. Use a plastic bumper repair kit or body filler to fix these flaws. After applying the filler, sand it smooth once it’s dry to blend seamlessly with the rest of the bumper.
Would you trust a paint job over a bumpy, uneven surface? Neither would your eyes. This step makes a big difference in the final look.
Masking Off Areas
Protect areas you don’t want painted by masking them off with painter’s tape and plastic sheeting. This includes headlights, grills, and any trim near the bumper. Take your time to ensure the tape edges are tight and secure to avoid paint bleeding.
Think of masking as setting boundaries for your paint—it keeps your work clean and professional.

Credit: m.youtube.com
Choosing The Right Spray Paint
Choosing the right spray paint is key to a smooth and lasting finish on your car bumper. The paint must match your bumper’s material and your vehicle’s color. Using the correct type of paint and quality supplies helps prevent peeling and fading. Let’s explore how to pick the best spray paint for this job.
Selecting Paint Type
Car bumpers are usually made of plastic or metal. Use paint designed for automotive use. Look for paints labeled as “flexible” or “plastic-compatible.” This type bonds better and moves with the bumper. Choose between acrylic enamel, urethane, or lacquer spray paints. Urethane paints offer strong durability but may need a special clear coat. Acrylic enamel is easier to apply and dries fast.
Picking The Color
Match your car’s original color for a seamless look. Use the paint code found inside the driver’s door or in the owner’s manual. Avoid guessing colors by eye. Many spray paints come in small cans with color chips or sample swatches. Test a small area to check the match. For a custom look, pick a color that blends well with your vehicle’s shade.
Gathering Necessary Supplies
Prepare these items before starting:
- Automotive spray paint matching your bumper
- Primer made for plastic or metal
- Clear coat spray for protection
- Sandpaper in various grits
- Masking tape and paper to cover areas
- Clean cloths and degreaser for surface prep
- Protective gloves and mask for safety
Having all supplies ready saves time and ensures a smooth process.
Setting Up Your Workspace
Setting up your workspace properly is key to a smooth and safe car bumper painting job. A clean and organized area helps you focus and avoid mistakes. It also protects your health and the environment from paint fumes and overspray. Preparing the space carefully makes the painting process easier and more efficient.
Finding A Well-ventilated Area
Choose a place with good airflow to reduce paint fumes. Open doors and windows if indoors. Avoid enclosed spaces without ventilation. Fresh air helps paint dry faster and keeps you safe. If possible, work outside on a calm day to prevent dust and debris from settling on the paint.
Protecting Surroundings
Cover floors and nearby objects with drop cloths or plastic sheets. Use painter’s tape to mask off areas you don’t want painted. Protect plants, furniture, and walls from paint splatters. This prevents damage and saves cleanup time later. Keep a trash bag nearby for used materials.
Organizing Tools And Materials
Gather all tools before starting. Place spray paint cans, sandpaper, primer, and clear coat within reach. Arrange items on a clean table or cart. Organize by steps: sanding, priming, painting, and finishing. Having everything ready prevents interruptions and helps keep the workflow steady.
Applying Primer
Applying primer creates a smooth base for paint to stick better. Spray a thin, even layer and let it dry completely before painting. This step helps prevent paint from peeling and ensures a lasting finish.
Applying primer to your car bumper is a crucial step in ensuring a smooth and durable finish. It’s not just about spraying; it’s about preparing the surface for the paint to adhere properly. This stage can make or break your paint job, so it’s essential to get it right.Shaking The Primer Can
Before you start, give the primer can a vigorous shake for at least two minutes. This helps mix the ingredients thoroughly, ensuring a consistent spray. You might be tempted to skip this step, but it’s worth the extra effort to avoid uneven application.Spraying Techniques
Hold the can about 8-12 inches away from the surface. Use smooth, sweeping motions to apply a thin, even coat. Overlapping each pass slightly ensures no spots are missed, resulting in a uniform base.Drying Time
Patience is key here. Allow the primer to dry completely, which usually takes about 15-30 minutes. Touch the surface gently to ensure it’s dry before moving on to the next layer or applying paint. Incorporating these simple yet effective techniques will set you on the right path to a professional-looking finish. Remember, a good primer application lays the foundation for a vibrant and long-lasting paint job.Spray Painting The Bumper
Spray painting a car bumper takes patience and attention to detail. It’s not just about applying paint; it’s about creating a smooth, even finish that lasts. Getting this right means your bumper looks professionally done and can withstand wear and tear.
Shaking The Paint Can
Before you start spraying, shake the paint can vigorously for at least one to two minutes. This mixes the paint and propellant evenly, which helps prevent clogging and uneven color. Have you ever sprayed paint only to get blotchy spots? That’s usually because the paint wasn’t mixed well.
Using Smooth Strokes
Hold the spray can about 6 to 8 inches from the bumper’s surface. Use smooth, steady strokes, moving your arm side to side rather than just your wrist. This keeps the paint layer thin and consistent, avoiding drips and runs.
Applying Multiple Coats
Instead of trying to cover the bumper in one heavy coat, apply several light coats. Each coat should add a thin layer of paint that builds up color gradually. This technique helps you avoid uneven textures and gives you better control over the finish.
Allowing Proper Drying
Let each coat dry completely before adding the next one. Drying times vary by paint type and weather conditions, but waiting 15 to 30 minutes is usually enough. Rushing this step can cause smudges or peeling later—have you noticed how a wet layer can ruin hours of work?
Adding Clear Coat
Adding a clear coat is a crucial step after painting your car bumper with spray paint. It protects the paint and gives a shiny finish that lasts longer. The clear coat forms a hard layer over the color, guarding it against scratches and weather damage.
Purpose Of Clear Coat
The clear coat acts as a shield for the paint. It protects from UV rays, water, and dirt. This layer also adds depth and gloss to the color. Without clear coat, the paint may fade or peel quickly.
Application Tips
- Spray the clear coat in thin, even layers.
- Keep the spray can about 6-8 inches from the surface.
- Use smooth, side-to-side motions to avoid drips.
- Apply multiple light coats instead of one heavy coat.
- Allow each layer to dry before applying the next.
- Work in a dust-free, well-ventilated area.
Drying And Curing
Let the clear coat dry for at least 20 minutes between layers. Full curing can take up to 24 hours depending on temperature and humidity. Avoid touching or washing the bumper during this time. Proper curing ensures a hard, durable finish.
Finishing Touches
Carefully remove masking tape and inspect the bumper for any paint flaws. Lightly polish the surface for a smooth, even finish that lasts longer.
Completing the paint job on your car bumper is an achievement worth celebrating. However, the journey doesn’t end just yet. The finishing touches ensure your bumper looks professionally painted and ready to shine on the road. This stage is all about attention to detail, as small tweaks can make a big difference in the final appearance.Removing Masking Tape
Carefully remove the masking tape to reveal crisp, clean lines. Gently peel it off at a 45-degree angle to avoid pulling any paint. Have patience. Rushing this step might ruin your hard work.Buffing And Polishing
Buffing is like giving your car a mini spa treatment. Use a microfiber cloth and car polish to buff the surface in circular motions. This step smoothens any rough areas and enhances the paint’s shine. Consider using a dual-action polisher for larger surfaces. It’s efficient and ensures a consistent finish. Your bumper should now have a glossy, showroom-ready look.Inspecting For Flaws
Inspect the bumper under good lighting to spot any imperfections. Look for uneven areas, drips, or spots you might have missed. Address these immediately for the best results. If you find small imperfections, a light sanding followed by a touch-up can work wonders. This step ensures that your bumper not only looks good but also holds up over time. Are you satisfied with your work? Ensuring every detail is perfect will give you the confidence to proudly show off your newly painted bumper.
Credit: m.youtube.com
Common Mistakes To Avoid
Painting a car bumper with spray paint can be rewarding, but mistakes can ruin the finish. Avoiding common errors saves time, money, and frustration. Knowing these pitfalls helps you get a smooth, lasting coat.
Over-spraying
Spraying too much paint causes drips and runs. Thick layers take longer to dry and look uneven. Hold the spray can at the correct distance, usually 6 to 8 inches. Apply thin, light coats instead of one heavy coat. Move the can steadily side to side for even coverage.
Ignoring Surface Prep
Skipping surface preparation leads to poor paint adhesion. Dirt, grease, and old paint layers block the new paint from sticking. Always clean the bumper with soap and water first. Sand the surface lightly with fine-grit sandpaper to smooth rough spots. Wipe the bumper with a tack cloth to remove dust before painting.
Rushing Drying Times
Not allowing enough drying time causes smudges and uneven texture. Spray paint needs time to cure between coats. Follow the paint manufacturer’s recommended drying time. Avoid touching or adding extra coats too soon. Patience ensures a smooth, durable finish that lasts longer.
Maintaining Your Painted Bumper
Maintaining your painted bumper is key to keeping it fresh and shiny. Proper care extends the life of the paint and prevents damage. Regular attention helps avoid costly repairs later on.
Cleaning Tips
Clean the bumper gently to protect the paint layer. Use a soft cloth or sponge with mild soap and water. Avoid harsh chemicals and rough scrubbing that can scratch the surface. Rinse well to remove all soap residues. Dry the bumper with a clean towel to prevent water spots.
Protecting The Paint
Apply a quality wax or sealant every few months. This adds a protective layer against dirt and UV rays. Park the car in shaded areas to reduce sun damage. Cover the bumper with a car cover if parking outside for long periods. Avoid parking near trees or places with heavy dust and debris.
Touch-up Advice
Check the bumper often for small chips or scratches. Use matching spray paint for quick touch-ups. Clean the area and lightly sand before painting. Apply thin coats and let each dry before the next. Keep touch-up paint handy to fix damage early and keep the bumper looking new.
Frequently Asked Questions
How Do I Prepare A Car Bumper For Spray Painting?
Clean the bumper thoroughly with soap and water. Sand the surface lightly to remove imperfections. Use a plastic primer for better paint adhesion. Ensure the bumper is dry before starting to paint.
What Type Of Spray Paint Is Best For Car Bumpers?
Use automotive spray paint designed specifically for plastic surfaces. Choose paint with UV protection and durability. Glossy or semi-gloss finishes work best. Always check compatibility with your bumper material.
How Many Coats Of Spray Paint Should I Apply?
Apply 2 to 3 light coats for even coverage. Allow each coat to dry for 10-15 minutes. Avoid heavy layers to prevent drips and runs. Finish with a clear coat for protection.
Can I Paint A Car Bumper Without Removing It?
Yes, but removing the bumper ensures better access and cleaner results. Mask surrounding areas carefully if painting without removal. Removing allows thorough cleaning and sanding, improving paint adhesion.
Conclusion
Painting a car bumper with spray paint is simple and affordable. Take your time to clean and sand the surface well. Apply paint evenly in thin layers for a smooth finish. Let each layer dry before adding the next one.
Protect your work with a clear coat to keep it shiny. With patience and care, your bumper will look fresh and new again. Practice makes perfect. Give it a try and enjoy the results.