

Want your car to shine like new without spending a fortune? You can achieve that showroom glow all by yourself with a simple car wax routine.
Imagine the satisfaction of seeing your car gleam under the sun, turning heads everywhere you go. In this guide, you’ll discover easy steps and insider tips to wax your car like a pro. Ready to save money and protect your ride?
Keep reading to unlock the secrets of DIY car waxing that anyone can do.
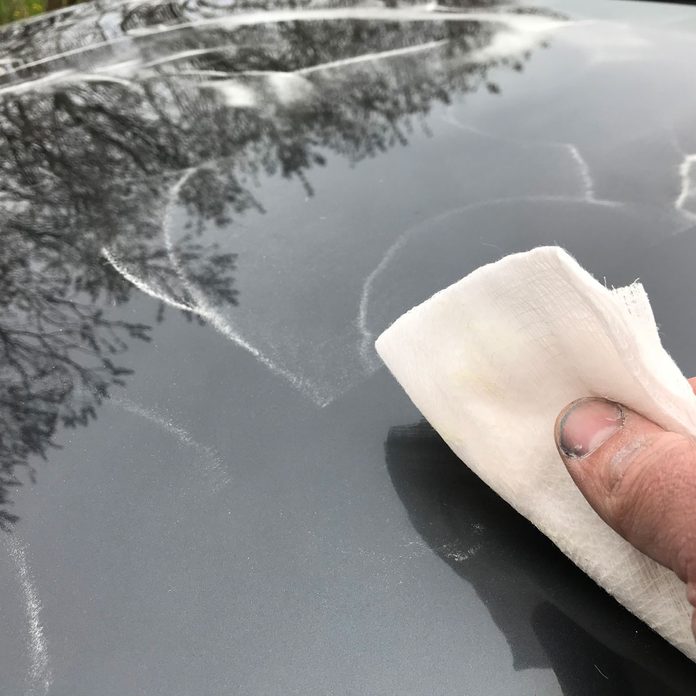
Credit: www.familyhandyman.com
Choosing The Right Wax
Choosing the right wax is key to a shiny, protected car surface. Not all waxes work the same for every vehicle. Understanding different wax types helps you pick the best one for your car’s paint and finish. The right wax keeps your car looking fresh and guards it against dirt, rain, and sun damage.
Types Of Car Wax
Car wax comes in many forms. Each type offers unique benefits and drawbacks:
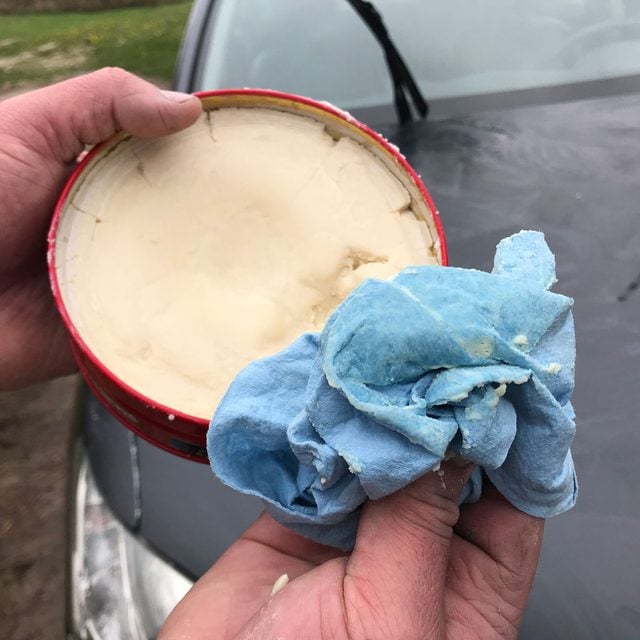
- Paste Wax:Thick and durable, it offers long-lasting protection.
- Liquid Wax:Easy to apply and quick to dry, perfect for beginners.
- Spray Wax:Fastest to use, but usually less durable than paste or liquid.
- Carnuba Wax:Natural and glossy, it gives a deep shine but needs more frequent application.
- Synthetic Wax:Made from polymers, it lasts longer and resists water well.
Wax Ingredients To Look For
Ingredients affect wax performance and finish quality. Check for these key components:
- Carnuba:Adds rich shine and natural protection.
- Carnauba blends:Combine natural wax with synthetic for durability.
- Silicone:Enhances shine but may build up over time.
- Polymers:Provide strong, long-lasting protection.
- UV inhibitors:Help shield paint from sun damage.
Best Wax For Different Paints
| Paint Type | Recommended Wax | Reason |
|---|---|---|
| Clear coat | Synthetic Wax | Strong protection without damaging finish |
| Single-stage paint | Carnuba Wax | Enhances deep color and shine |
| Matte paint | Matte-specific Sealants | Protects without adding gloss |
| Metallic paint | Liquid Wax with UV inhibitors | Preserves metallic flakes and color |
Credit: www.familyhandyman.com
Preparing Your Car
Preparing your car properly is the foundation for a flawless DIY wax job. Skipping this step can leave dirt and old residues trapped under the new wax, reducing its shine and protection. Taking time to clean and prep your car ensures the wax adheres well and delivers that showroom finish you want.
Cleaning And Washing
Start with a thorough wash to remove loose dirt and grime. Use a car-specific shampoo and a soft sponge or mitt to avoid scratching the paint. Focus on one section at a time, rinsing frequently to keep dirt from rubbing back onto the surface.
Don’t forget areas like wheel wells and bumpers where buildup hides. Have you noticed how even a little leftover dirt dulls the wax? Getting your car spotless at this stage pays off in the long run.
Removing Old Wax And Contaminants
Old wax and embedded contaminants can block the new wax from bonding. Use a clay bar or a dedicated wax remover to clear these stubborn residues. Clay bars might feel odd at first, but they work wonders in lifting invisible particles stuck to the paint.
After using the clay bar, wipe down the car with isopropyl alcohol or a pre-wax cleaner. This step guarantees no oils or leftover polish interfere with the wax. Have you ever skipped this only to find your wax peeling prematurely? Avoid that frustration by being thorough here.
Drying Techniques
Proper drying prevents water spots and streaks that spoil your finish. Use a clean microfiber towel and gently blot the surface instead of rubbing harshly. Air drying in the shade also helps, but avoid parking under direct sunlight to keep the paint cool.
Consider using a leaf blower or compressed air to blow out water from crevices and around trims. These small details make a big difference in the overall look once waxed. How often do you check these hidden spots before waxing your car?
Essential Tools And Supplies
Preparing for a DIY car wax session requires specific tools and supplies. These items make the waxing process easier and ensure a smooth, shiny finish. Using the right equipment helps protect your car’s paint and saves time.
Gathering quality tools is the first step. Each tool has a unique role in the waxing process. Knowing their purpose helps you use them effectively for the best results.
Applicator Pads
Applicator pads spread wax evenly on your car’s surface. They come in foam or microfiber materials. Foam pads are soft and work well with liquid waxes. Microfiber pads hold more wax and reduce waste. Choose a pad that fits your wax type. Clean applicator pads prevent dirt from scratching your car.
Microfiber Towels
Microfiber towels remove excess wax and buff the surface. Their soft texture protects paint from scratches. Use clean towels for each step to avoid contamination. They absorb wax residues and help achieve a high gloss shine. Having several towels on hand speeds up the process.
Buffers And Polishing Machines
Buffers and polishing machines save effort and improve results. They rotate to spread wax evenly and polish the paint. Dual-action buffers are safe for beginners. They reduce the risk of damaging the paint. Machines work best on large areas and save time. Always use the right pad with your buffer for safe waxing.
Wax Application Steps
Applying car wax properly is key to protecting your paint and making your car shine. Following the right steps ensures the wax covers the surface evenly, sets well, and brings out a smooth, glossy finish. These steps are simple and help you get the best results from your DIY car wax.
Applying Wax Evenly
Use a soft applicator pad for smooth coverage. Dab a small amount of wax onto the pad. Spread the wax in small, circular motions. Work on one section at a time, about two square feet. Apply a thin, even layer to avoid streaks and buildup.
Timing For Wax To Set
Let the wax dry until it forms a haze. This usually takes 5 to 10 minutes. Avoid leaving it too long or wiping too soon. Check a small area by touching gently. The wax should feel dry but not sticky.
Buffing For A High Gloss
Use a clean, soft microfiber cloth for buffing. Move the cloth in circular motions to remove the haze. Apply light pressure to bring out shine. Continue buffing until the surface looks smooth and glossy. Change to a fresh cloth if it gets dirty or oily.
Tips For A Flawless Finish
Getting a flawless finish on your car with DIY waxing isn’t just about slapping on the wax and buffing it off. It requires attention to detail and some smart habits that can make all the difference in the end result. Here are some key tips to help you avoid pitfalls, choose the right environment, and keep your car shining longer.
Avoiding Common Mistakes
Applying wax over a dirty or wet surface traps grime and water, leaving streaks and dull spots. Always wash and dry your car thoroughly before you start waxing.
Using too much wax isn’t better; it just makes it harder to buff out and can leave a hazy residue. Apply a thin, even layer for easier polishing and a clearer shine.
Buffing too aggressively can damage the paint. Use gentle, circular motions and soft microfiber cloths to protect your car’s finish while enhancing the shine.
Waxing In Optimal Conditions
Wax your car in a shaded area or during cooler parts of the day. Direct sunlight heats the surface and can cause the wax to dry too quickly, making it tough to buff.
Ideal temperature for waxing is between 50°F and 85°F (10°C to 29°C). If it’s too cold, the wax won’t spread evenly; if too hot, it’ll become sticky and uneven.
Try to avoid windy conditions that can blow dust onto your freshly waxed surface. Clean air helps you get a smooth, spotless finish.
Maintaining Your Shine
After waxing, regular washing with a gentle car shampoo helps maintain that glossy look without stripping the wax layer. Harsh detergents can degrade your hard work quickly.
Consider applying a quick detailer spray between waxes. It boosts shine and removes light dust, extending the time between full wax jobs.
Don’t wait for your car to look dull before waxing again. A good rule is every 3 months or after every 3,000 miles, but check your wax’s instructions for the best timing.
Diy Waxing Frequency
Wax your car every three months to keep its shine and protect the paint. Frequent waxing helps prevent dirt buildup and damage from weather. Regular care makes your car look new longer.
Determining how often to wax your car can be a bit of an art. It largely depends on factors like your driving habits, local climate, and the condition of your car’s paint. Regular waxing not only enhances the shine but also protects the paint from environmental damage. But how do you know when it’s time for a fresh coat?Seasonal Considerations
Weather plays a crucial role in deciding your waxing schedule. In warmer climates, the sun’s UV rays can be harsh on your car’s exterior, necessitating more frequent waxing. Conversely, in colder regions, road salt and grime can wear down the protective layer, requiring a touch-up every few months. It’s wise to adjust your waxing routine with the seasons to maintain optimal protection.Signs Your Car Needs Waxing
Your car often signals when it needs attention. A dull or uneven surface indicates the wax layer has worn off. If water stops beading on the surface, it’s a clear sign that the protective layer is compromised. Listen to your car’s cues to keep it looking its best.Balancing Waxing And Polishing
Waxing and polishing serve different purposes. While waxing protects, polishing removes minor scratches and blemishes. Over-polishing can thin the paint, so it’s crucial to find the right balance. Typically, you might polish once or twice a year, while waxing can be done more frequently. It’s all about maintaining that perfect shine without overdoing it. Experiment with different routines to find what works best for your car and lifestyle. What is your car telling you today?Troubleshooting Wax Issues
Waxing your car by yourself is rewarding but can bring some common problems. These issues affect the car’s shine and protection. Learning how to fix them keeps your vehicle looking its best. Troubleshooting wax problems is simple with the right steps. Below are key tips to handle common waxing troubles effectively.
Removing Haze And Streaks
Haze and streaks happen when wax is not buffed properly. Use a clean, soft microfiber cloth to remove leftover wax. Work in small circular motions to polish the surface. Avoid harsh pressure to prevent scratching. Buff the car in the shade to stop wax from drying too fast. This clears haze and brings out a smooth, glossy finish.
Fixing Uneven Coverage
Uneven wax looks patchy and dull. Apply wax in thin, even layers to avoid this. If uneven spots appear, reapply wax lightly on those areas. Use a foam applicator for smooth spreading. Let the wax dry to a haze before buffing. This ensures the entire car is covered uniformly and shines bright.
Handling Wax Build-up
Wax build-up creates a rough texture and dulls the paint. Remove build-up by washing the car with a gentle car shampoo. Use a clay bar to clean stubborn residues. Avoid stacking too many wax layers without cleaning in between. Regular maintenance prevents heavy build-up and keeps the wax fresh and protective.
Eco-friendly Wax Options
Choosing eco-friendly wax options benefits both your car and the planet. These waxes are made from natural ingredients, reducing harmful chemical exposure. They are biodegradable, ensuring minimal environmental impact. Using eco-friendly waxes can enhance your car’s shine while protecting nature.
Natural And Organic Waxes
Natural and organic waxes use ingredients from plants and bees. Carnauba wax is a popular choice, derived from palm leaves in Brazil. It provides a hard, glossy finish, perfect for car enthusiasts. Beeswax is another excellent option, offering a natural shine and protective layer. These waxes avoid synthetic substances, making them safer for you and the environment.
Benefits Of Eco-friendly Choices
Eco-friendly waxes reduce your carbon footprint. They are free from harmful chemicals, protecting your health. These waxes are less likely to cause allergic reactions or skin irritations. Using them can improve air quality, as they release fewer volatile compounds. Your car’s paintwork benefits too, as they provide a gentle yet effective shine.
Where To Buy Green Products
Many online retailers offer a range of eco-friendly waxes. Check out platforms like Amazon or specialty eco-stores. Local health food stores often stock natural car care products. Automotive supply shops may carry green wax options as well. Always read labels to ensure products meet eco-friendly standards.

Credit: www.youtube.com
Frequently Asked Questions
What Are The Benefits Of Diy Car Wax?
DIY car wax protects paint from UV rays, dirt, and moisture. It enhances shine and extends your car’s appearance. Waxing yourself saves money and allows you to maintain your car regularly. It’s easy, quick, and provides professional-looking results at home.
How Often Should I Wax My Car Myself?
Wax your car every 3 to 4 months for optimal protection. Frequent waxing keeps paint smooth and glossy. If you live in harsh climates, wax more often to prevent damage. Regular waxing preserves your car’s value and appearance over time.
What Tools Do I Need For Diy Car Waxing?
You need car wax, microfiber cloths, applicator pads, and a clean sponge. Use a soft, clean cloth to apply and buff wax. Optional tools include a car wash soap and a hose for pre-washing. Proper tools ensure even application and a smooth finish.
Can I Wax My Car In Direct Sunlight?
Avoid waxing in direct sunlight; it can cause streaks and uneven application. Wax dries too fast under the sun, making buffing difficult. Choose a shaded, cool area for best results. This ensures smooth, streak-free wax coverage.
Conclusion
Doing your own car wax saves money and gives great results. You control the process from start to finish. It keeps your car shiny and protected longer. With the right tools, waxing is simple and fun. Regular waxing helps your car look newer every day.
Try it yourself and enjoy the satisfaction. Your car will thank you with a bright, clean finish.